Version control with git
Last updated on 2023-01-24 | Edit this page
Estimated time 12 minutes
Overview
Questions
- What is version control?
- How to use git in Rstudio?
Objectives
- Explain the basics of git
- Demonstrate how stage and commit files
- Demonstrate pulls and pushes from a remote repository
Read the rest of the lesson if you don’t know how to stage, commit, push or pull changes!
Version control with git
Have you ever needed to refer back to the edit history of a document to restore a change you’d made? Or maybe you’ve sometimes worried about losing files that are only on your computer? Do you waste lots of time deploying software manually?
OK, so maybe most of you probably haven’t wasted time deploying software manually, but perhaps the other two are concerns you’ve had at some point.
All of these issues can be solved with the version control software git, when used together with a cloud-based repository such as github, bitbucket or gitlab.
git keeps track of all the revisions to a repository that contains your code, allowing you to see when and where changes were made.

It also allows you to collaborate easily with other people with branches and methods for merging changes.

In my opinion, it’s an essential part of any project that involves code. So how does it work?
Creating a repository
We’ll be working with git through Rstudio (there is a command line interface that I usually use, but it’s used differently for each OS and has a bit more of a learning curve).
After you’ve installed git, you’ll need to let Rstudio know how to find it.
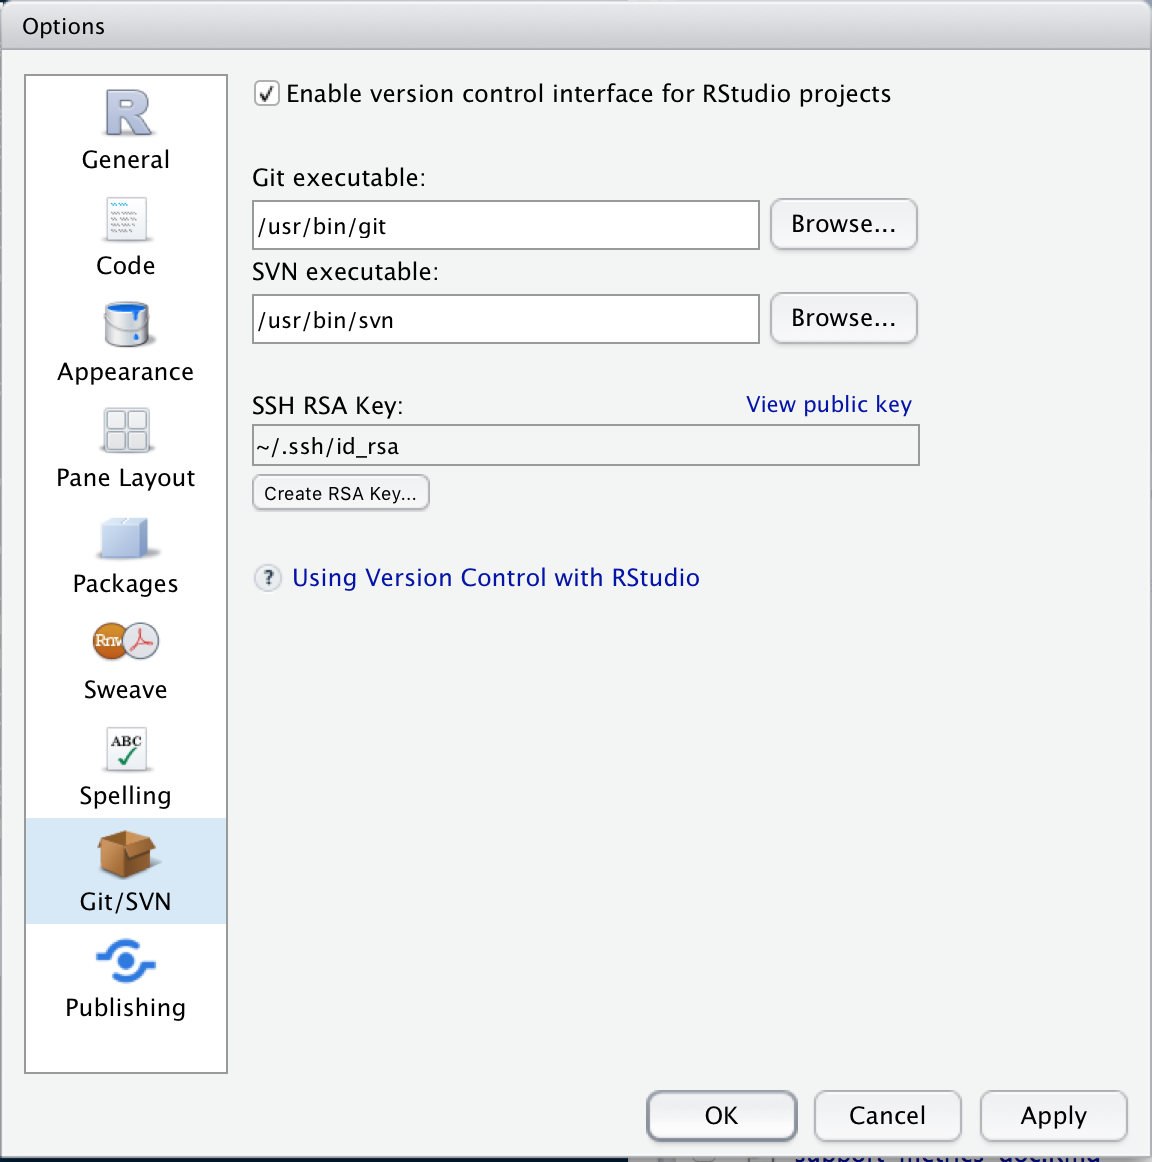
- Open Tools > Global Options and click on Git/SVN.
- Check Enable version control interface for Rstudio projects.
- Set the path for the git executable. If you don’t know where this is, click on the
Terminaltab in the bottom left pane and type:
- Windows:
where git- it’ll be something likeC:/Program Files (x86)/Git/bin/git.exe - MacOSX:
which git- it’ll be something like/usr/bin/git
- Restart Rstudio
The easiest way to start working with a project is to initialize an empty repository. I’ll walk you though the process with github, but you can also use bitbucket or gitlab if you prefer (although I’m not as familiar with these).
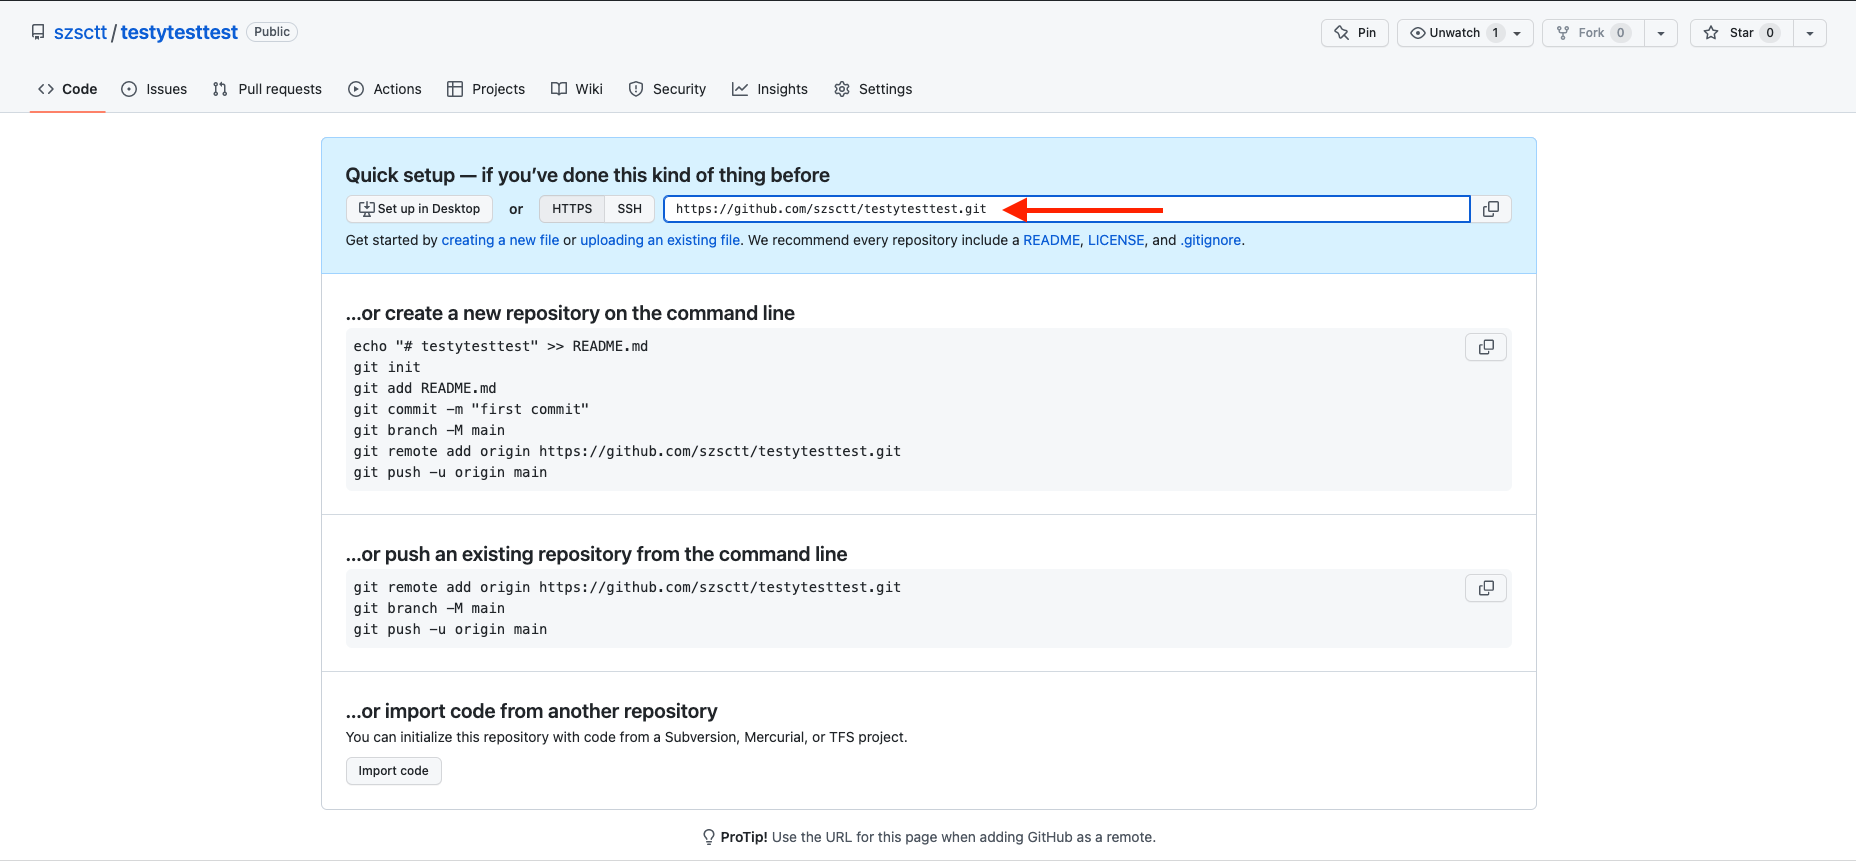
Head to github and if you aren’t already logged in, look for the Sign in and Sign up buttons in the top right corner. Make an account if necessary, and then sign in. On the left hand side next to Top Repositories, click New. Give your new repository a name and a description, and decide if you want it to be public or private. Check the Add a README file box, then create the repository.
Back in Rstudio,
- Open File > New Project
- Select Version Control > Git
- Grab the HTTPS URL from github (see picture below) and fill in the Repository URL box
- Set a name for your project directory - I usually make it the same as the name of the repository on github
- Choose where you want the project directory to be located
Making changes
After you’ve set up your project, you’ll probably want to add the .Rproj file to version control. A new Git tab is available in the top right pane where you can do this. You’ll see in this panel that RStudio has created an .Rproj file for you when it created the project directory, and there’ll be some ? next to the file name.
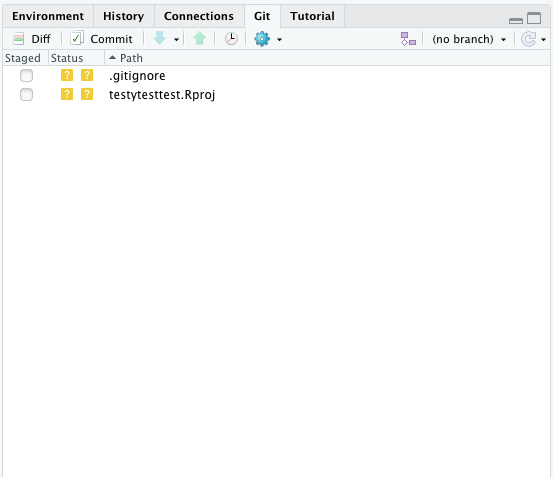
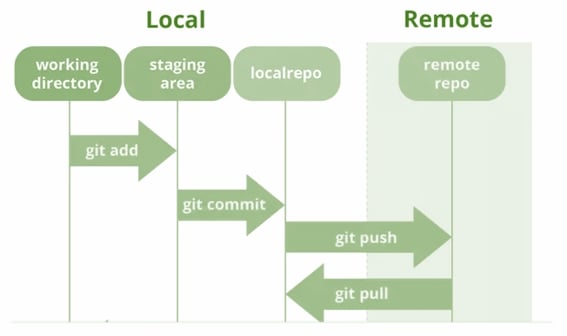
At this point, you need to know how Git thinks about your files. There are three statuses that your files can have:
- Before you have told git about any of your changes, they only exist in your working directory.
- To tell get that you’ve made some changes to your file, you need to stage it (
git add). - Tell git that you’re happy with the changed files by committing them.
You can reset the files in your repository to an earlier version using the checkout process.

Staging
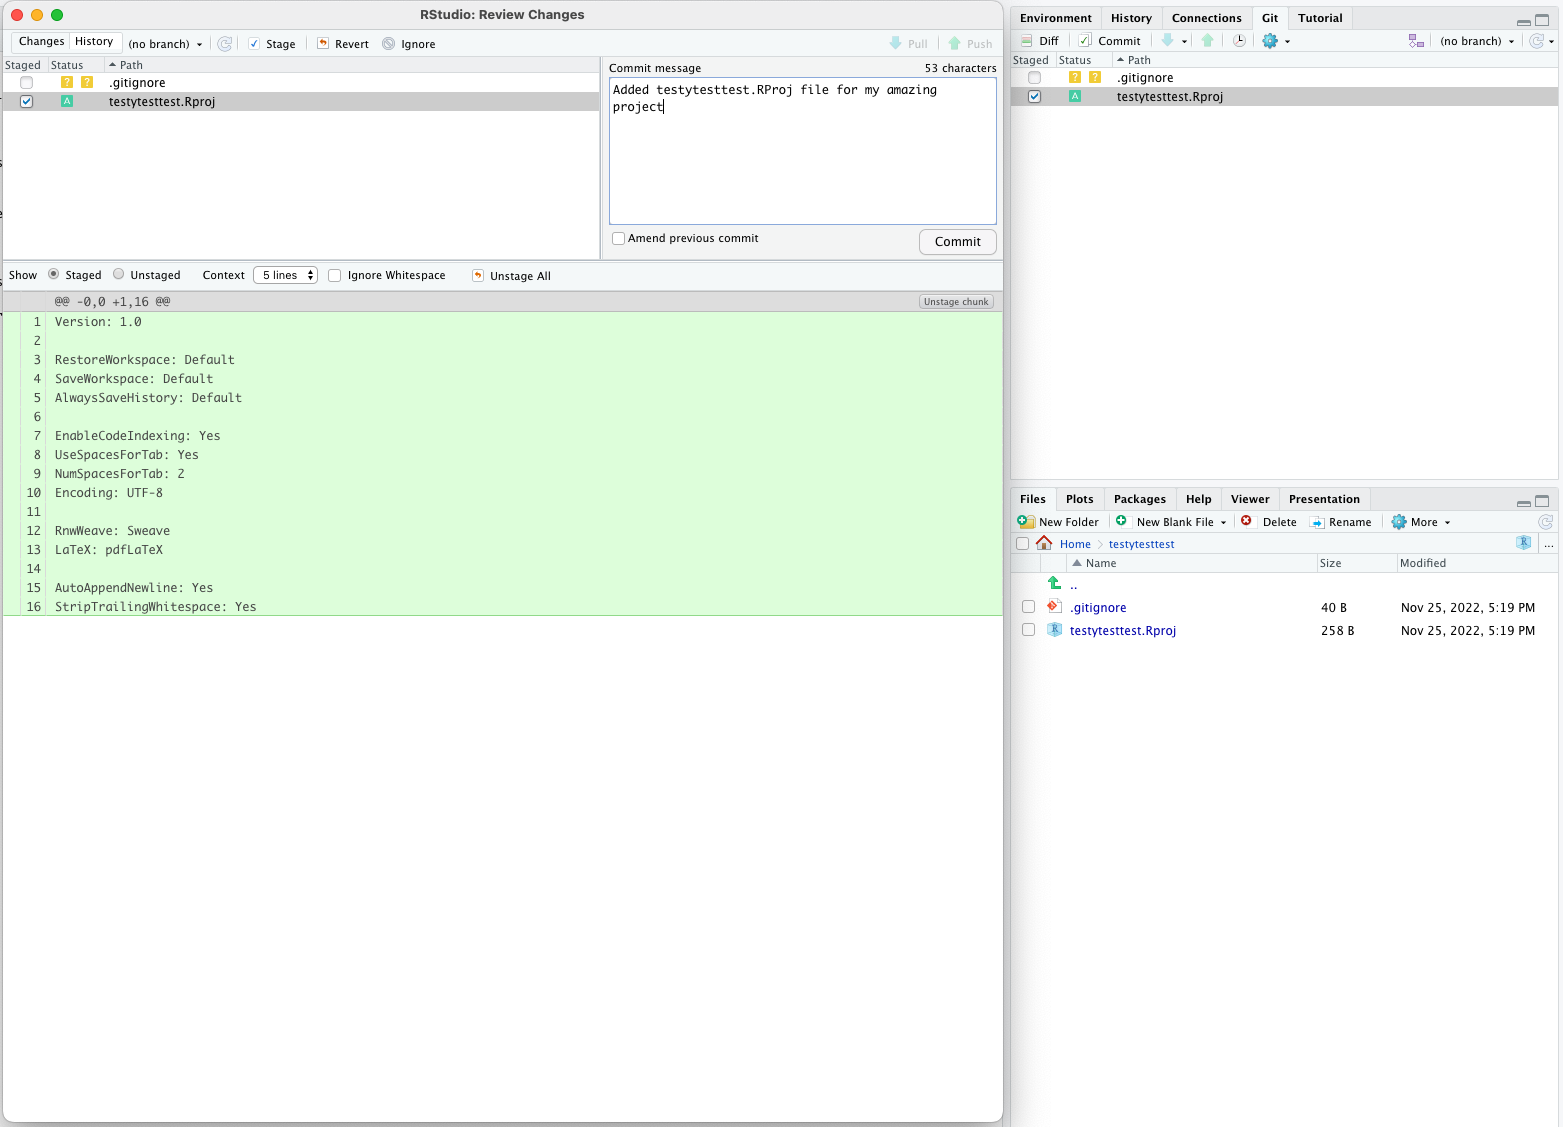
So how do we stage a file? Just check the box next to the file name in the Git panel.

Diff
At any time, you can check what you changed relative to the latest commit by clicking on Diff.
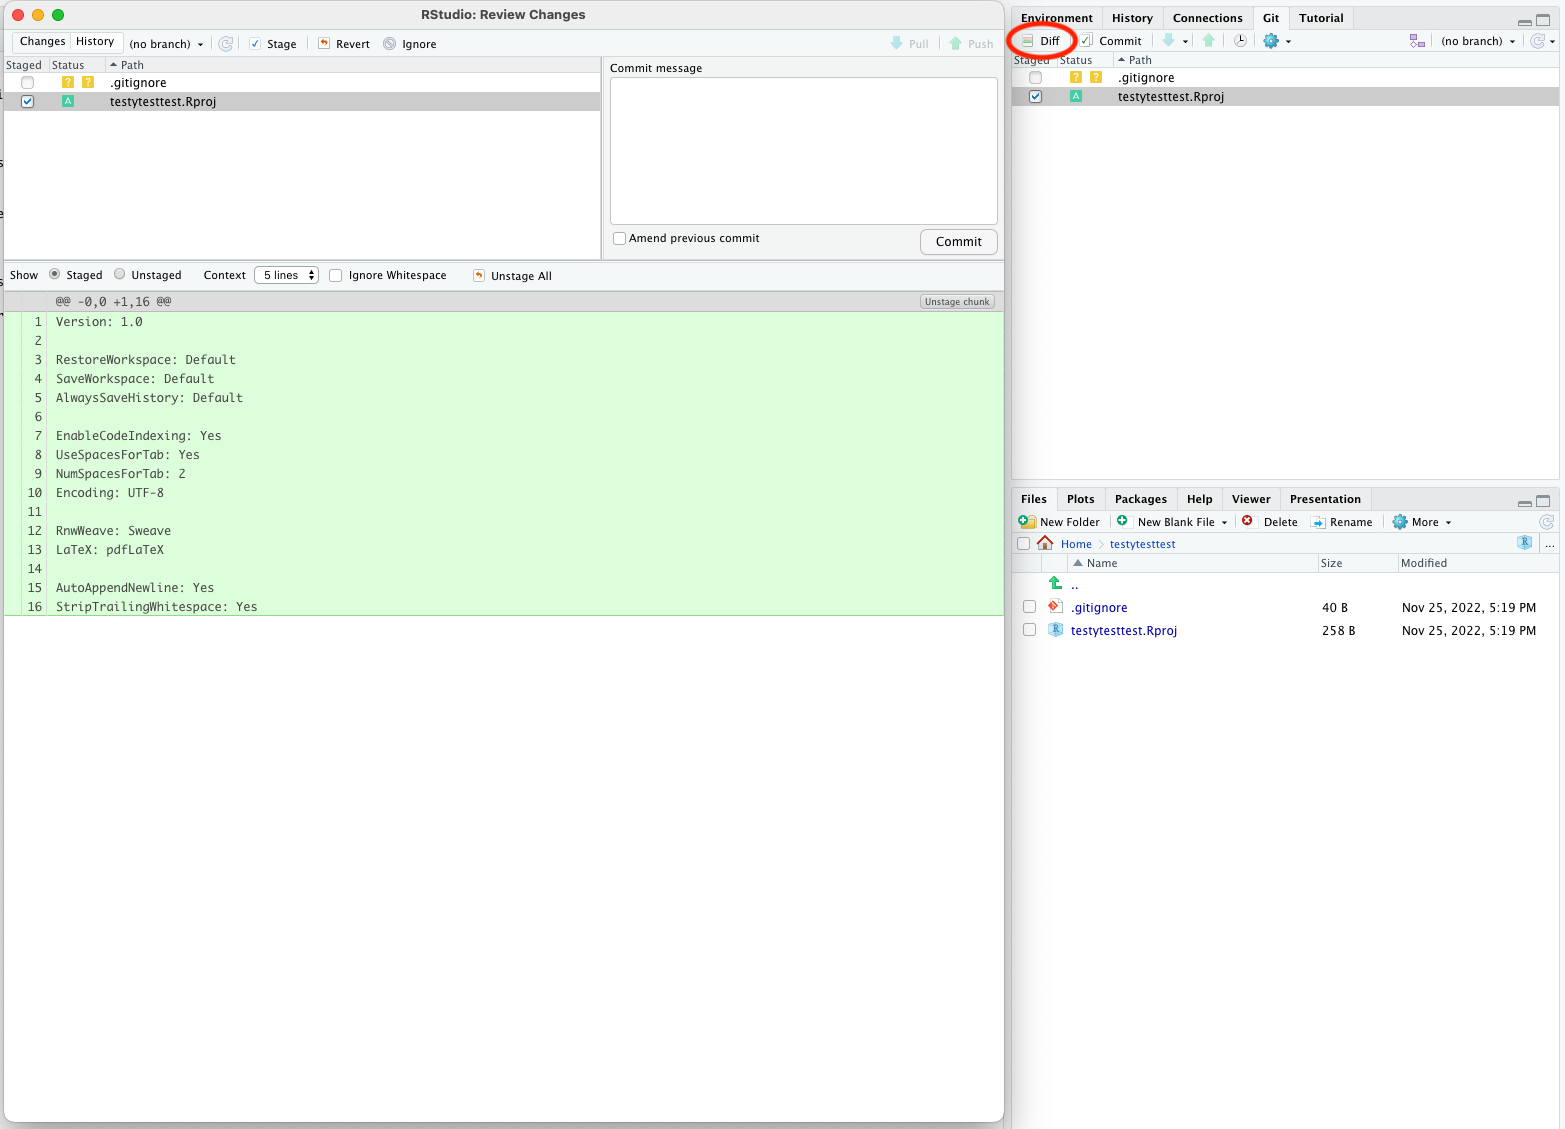
In this case, all the lines are green because we’re adding a new file.
Commit
If you’re happy with the changes you’ve made, you can commit them using the Commit button (next to Diff). You will see the same view with your changes as you did with Diff, and an additional box to add a commit message - this is required for all commits. Try to make it as informative as possible!
 You should get a pop-up telling you the commit was successful.
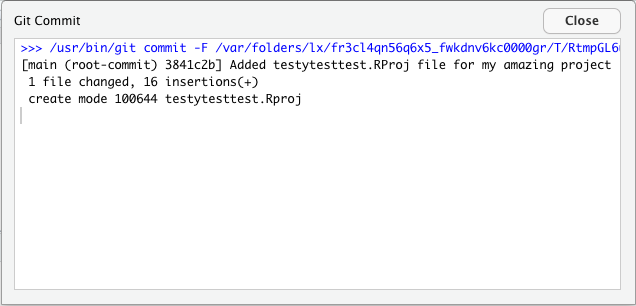
Push/pull
So far all the changes we’ve made have been to the local repository (that exists only on your computer). After you’ve made some commits, you should push the changes to your remote repository so that your collaborators can see them, and they’re backed up in the cloud. If someone else has made changes to the same branch, you might need to pull and merge any changes that are in the repository but not on your local computer first.
You can push and pull from the same pop-up panel you get when you click Commit, or int the Git tab in the top-right pane.
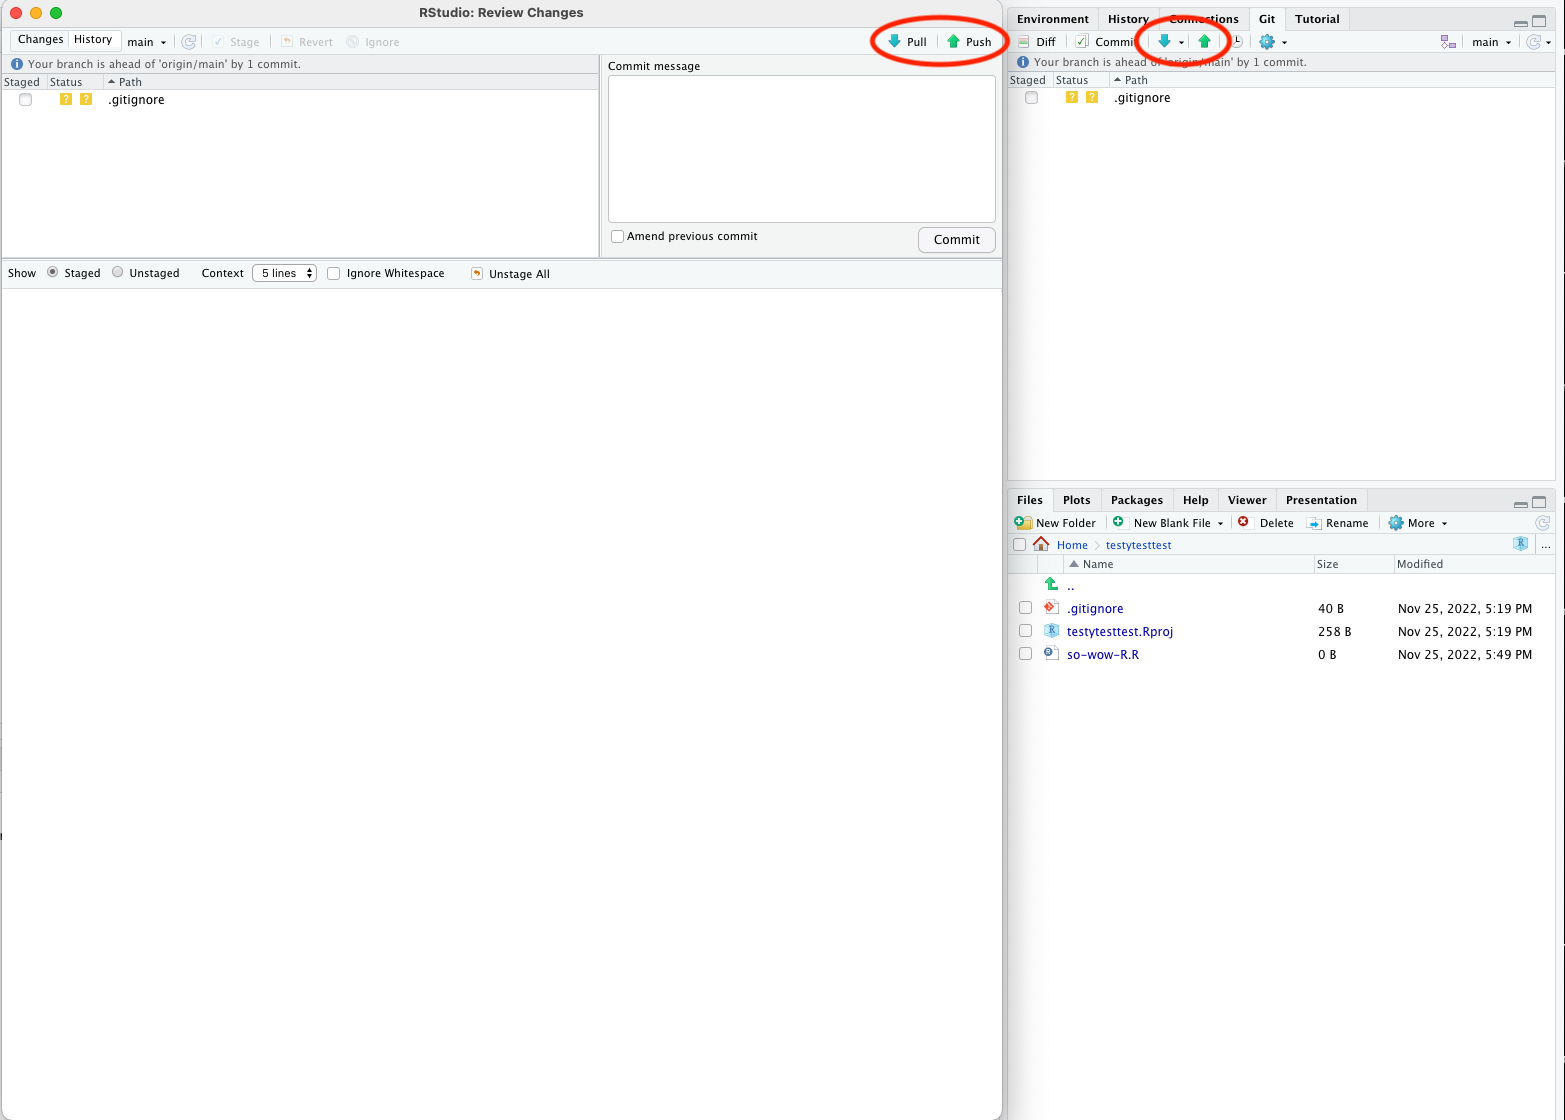
Your first push should be pretty straightforward.
Generating a token
The first time you try to push to a remote repo, you will be prompted for your password. This is somewhat misleading, because this git isn’t asking your account password, but a token that you’ll need to generate.
To generate a token, head to github, log in and click the circle icon with a down arrow next to it in the top right hand corner of your screen. Select Settings, and from the left-hand menu select Developer Settings. On the left-hand menu on the new page, select Personal Access Tokens > Tokens (classic) . On the right hand side, click Generate new token > Generate new token (classic). Fill in a name for the token in the Note box, select an Expiration period (I usually use 90 days, and I don’t recommend ‘No expiration’), and tick the repo box.
This will generate a token that you’ll only be able to see once. Save it to a password manager in case you need it again, and then use it as your password if prompted.
If there are changes in the remote repository that you don’t have in your local repository, you’ll need to pull them before you can push any changes.

The first time you try a pull like this, you might get this message:
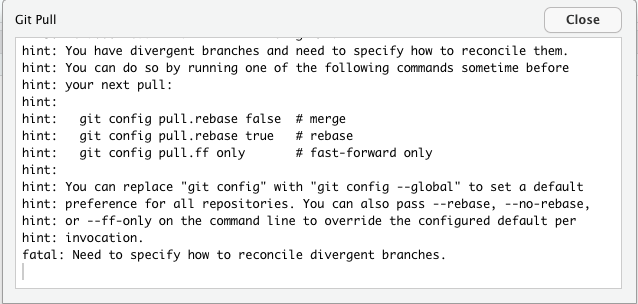
This just means that you have to open a terminal and type in one of those options. I won’t go into details about what they all mean, but I usually use git config pull.rebase false. You’ll have to open a shell from the menu with Tools > Shell (on Mac you can just use the terminal pane at the bottom left), type this command and press enter.
Try your pull again and it should then work. Your files should be updated!
Branches
I mentioned earlier that you can create branches. Their purpose is to facilitate work on the same files as your collaborators without immediate conflicts. When you are ready to integrate your changes, you can open a pull request and merge the changes.
While using branches is a fundamental part of git, I won’t go into any more detail than that now. You can read more about how branches work in the git documentation.
Command line git
So far, we’ve used git through the Rstudio terminal. However, this will only get you so far, and eventually you’ll want to do something more complicated you’ll probably need to use a shell. You can open one from the menu with Tools > Shell.
The git documentation has all the information you’ll need for using the command line, but just to get you started, you can try:
BASH
# print summary of changed, staged files
git status

# stage file
git add <file1> <file2>

# commit changes
git commit -m "My informative commit message"

# push to remote
git push

# pull changes from remote
git pull
Git gotchas
There are a few things you should be aware of when working with git.
Don’t add large files
Git was designed for working with source code (text files), not binaries or large datasets. Every time you check the status of your repository with git status, it looks at all the files that you’ve committed. If you have added large files, like NGS data, large images, or compiled binaries, git has to look through those files for changes, which can really slow things down.
I tend to avoid adding any of the data that I’m working with to version control, unless it’s a very small text file or image. Github also limits the size of individual files, and the total size of each repository, so avoid hitting those limits by keeping large files separate. You can still keep them in the same directory as your code, but avoid doing git add on them.
Keep other backups
Although your code is pretty safe in the cloud, it’s good practice to keep other backups of your code elsewhere. Since your data shouldn’t be in your repository, you’ll need to think about other backups anyway. So keep your code and data backed up somewhere else, like other clouds (e.g. One Drive), CMRI shared folders and portable hard drives (but never only on a portable hard drive).